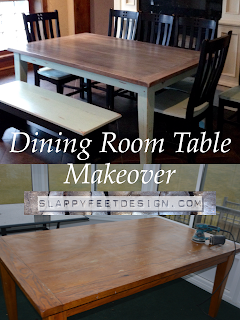
This was a fun and a very hard project. I went to watch my sisters 7 kids while they went to Hawaii. I decided it would me fun to transform her table and chairs while she was gone. Not only did I have her seven children and one of mine, but it was in the negitives outside. So I froze everytime I went out, I would work on the table till I couldn't take it any longer. This room I worked in was a sun room, I had to have the windows all open and it wasn't a heated room. Thankfully I had this room or there is no way I could have done it...even though the windows were open it cut down on the wind and it was howling the whole week it took me to complete this beautiful farmhouse table makeover.
Step one: Sanding...
Oh my this was the hardest table to sand...I would sand and sand and sand, then I would wipe it off thinking, it has to be done...nope still shiny. I did that over and over and over. It took me 3 of my 7 days to sand.
Here is my wonderful niece helping me sand. I am such a lucky Aunt.
While sanding I discovered that her "all wood" table wasn't all wood on the top middle...I was devastated! I thought...oh great I just ruined her table...I couldn't even work on it for a day...now I was on day 4 and running out of time! I decided that I had to get it done and hope for the best.
Step 2: Staining
This was fun but I had to wait inbetween coats for it to dry so I was scared I wouldn't finish, especially because the first coat of stain I put on, wasn't dark enough and it actually looked like the finish I just took off...
So I went and bought an amazing stain! I love it it is from Old Masters, I don't seem to have a picture of it...I will try and remember to take one and add it later.
Now I had this beautiful undercoat... I wanted to have a grey distressed finish so I added a coat of white wash pickling wood stain from Miniwax.
I did drybrush on and wipe off/smear some gray chalk paint in a few areas where wanted a little more grey. It was beautiful!
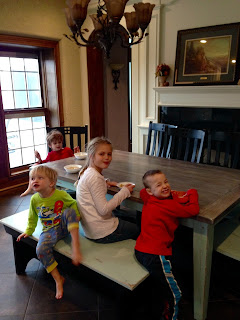
Since the table was gone all week we had so much fun eating picknic style!
...and playing on the chairs!
Step 3: Painting
I painted the base and legs and all the seats for the bench seat and 6 chairs. I used Rust-oleum chalk paint, color was Serenity Blue. I loved how it turned out! The color looked a lot different after it was sealed.
It was too cold to snow...it only snowed a tiny bit then got super super cold...
We started painting outside, and couldn't take the cold...and it was drying the paint too fast...so we took everything inside.
I had my niece help me! I love these kids so much, it was so fun to do this fun project with them!
Step 4: Distressing
Step 5: Sealing
I was out of time so I did 7 coats of water based polyurethane, because the dry time was a lot faster. Not a good permanent choice...so I had my sister reseal it about 4 months later with a oil based seal.
I would recommend doing the oil based from the start and put about 7-9 coats.
When staining I put a coat of the poly on, let it dry. After it is completely dry, I lightly sanded, wiped it down. Repeat...7-9 times.
First meal after bringing the table back in...success! They love it! I hope you love it too! Comment with pictures if you redo your farmhouse table.


